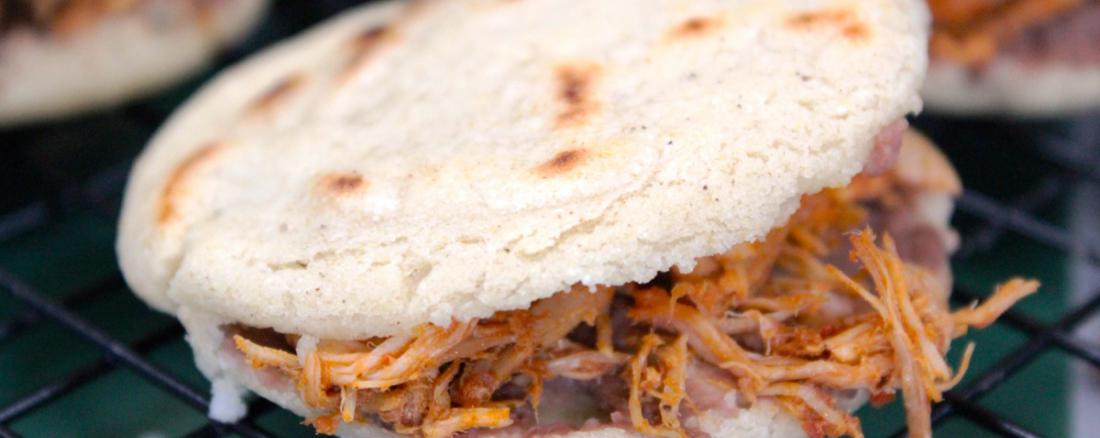
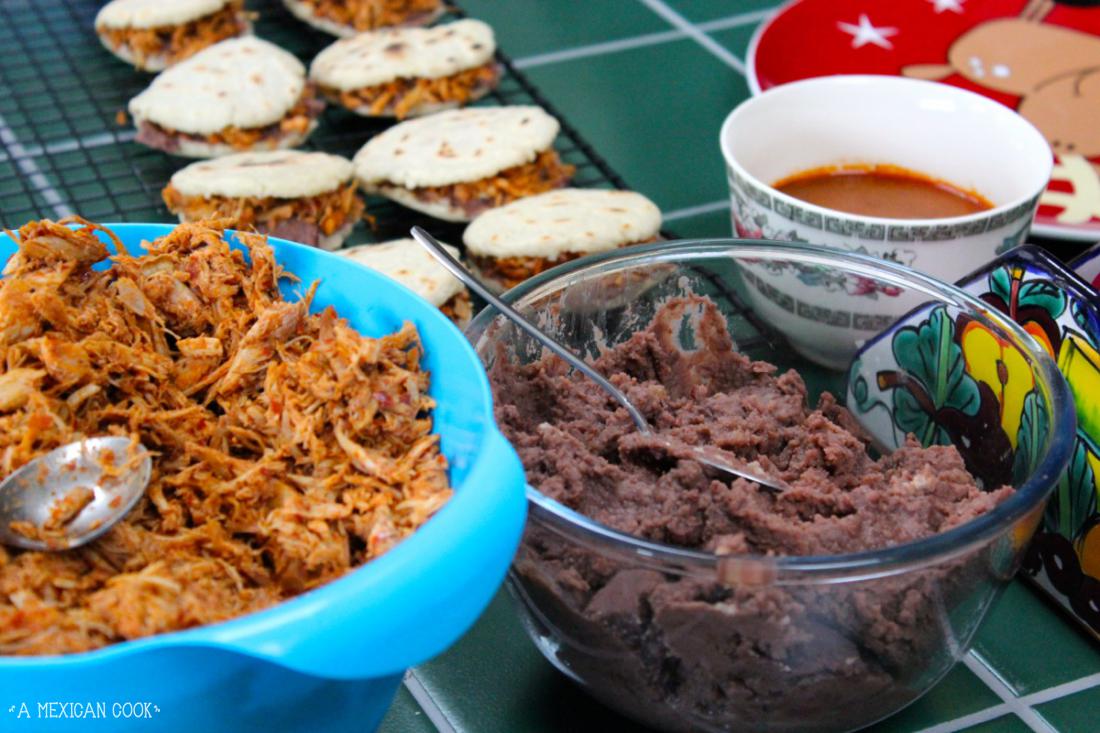
I love Gorditas. They are a sort of maize masa-harina edible parcel that you can stuff with your favourite filling. They're also known as Itacates (from a Nahuatl term used to refer to food to take on a journey or into the fields). My mam has made them for years and it was one of my favourite supper dishes when I was a child. They're sold in food markets across Mexico and they are one of my top ten Mexican street foods. They are yummy, healthy and easy enough to prepare. They freeze well and are perfect to get rid of any leftovers. I made these stuffed with refried beans and my cascabel spiced turkey leftover recipe for New Years Eve, but you can fill them with potatoes & chorizo, beans and cheese, chorizo and cheese, or anything you can think of. It's the perfect dish to be creative.
The secret of these Gorditas is in having everything you need, where you need it, when you need it. After that, it's all in the clapping. I've seen ladies in the street markets making gorditas in three 'claps' (this will all make sense when you read the recipe), so I am going to give you a word of advise: be patient with yourself and expect to make a few mistakes the first time. Just keep in mind that practice makes perfect!
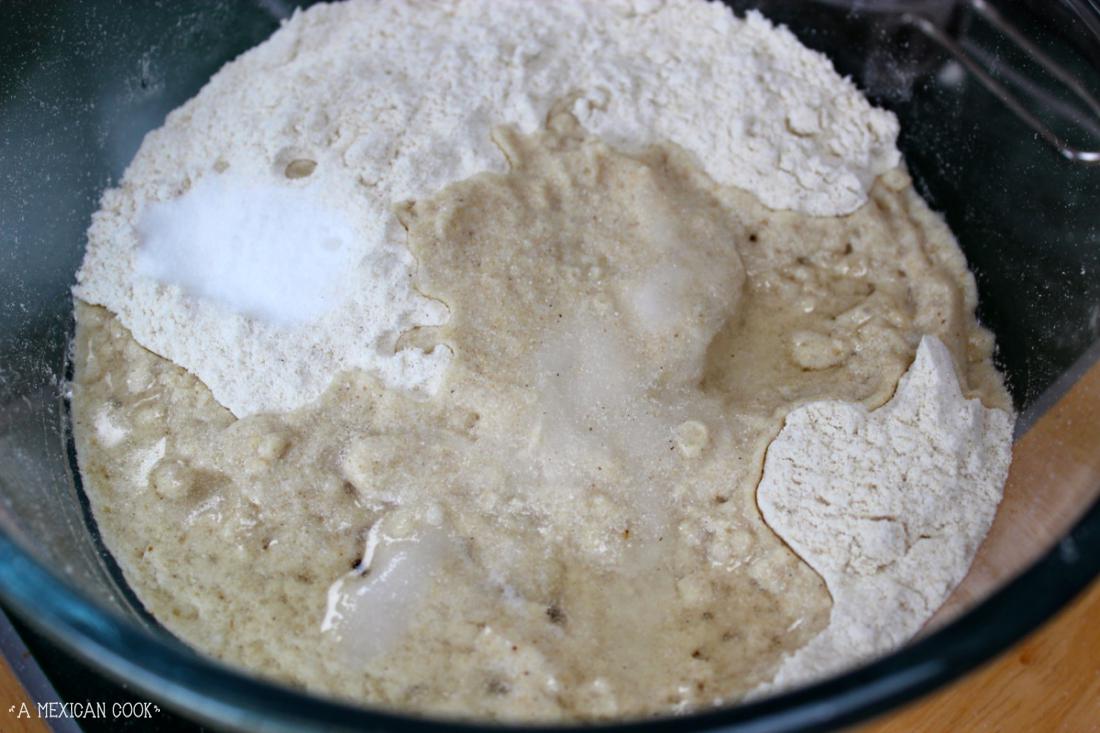
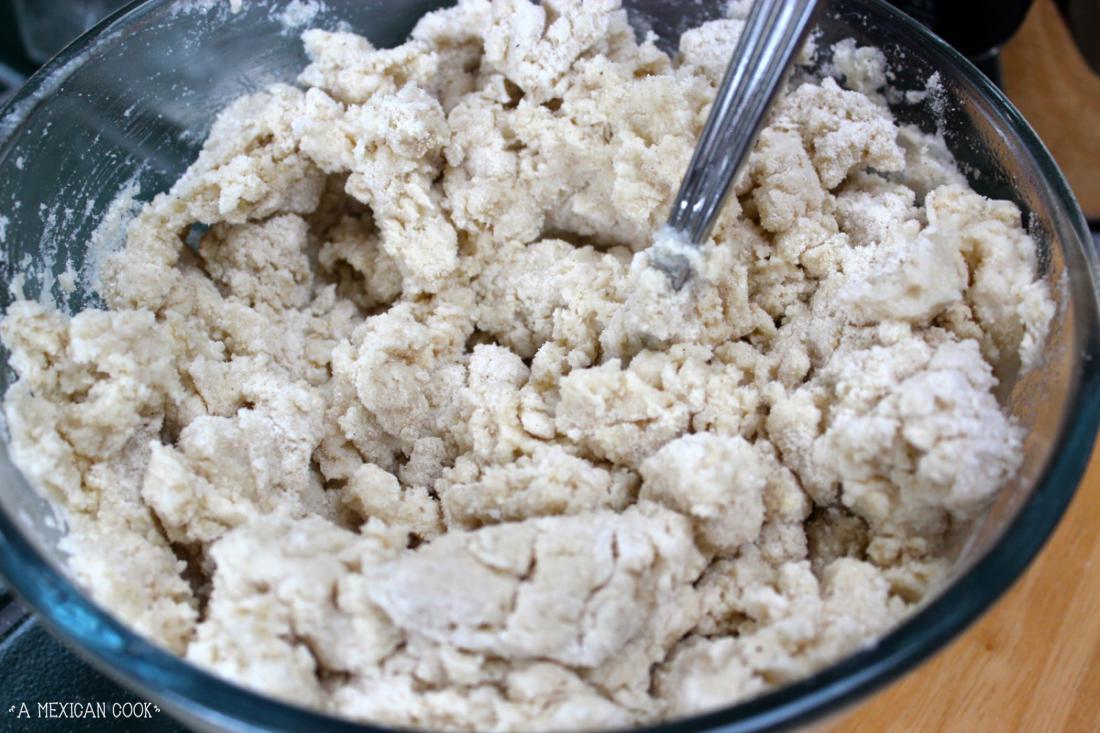
Begin by boiling the kettle and let the water rest for a while. The water for this recipe must be very hot, but not boiling. Put your masa-harina and salt in a mixing bowl. Add the oil and hot water and using a fork, mix this into a dough. Don't use your fingers until the dough has cooled down a bit or you might get burnt.
While the dough cools down a bit, half fill a bowl of fresh water and place it next to the dough. Also start heating your non-stick pan dry (i.e. no oil or butter on it). Place the knife near the hob on top of a plate and have some kitchen paper towels near by to wipe the knife clean every now and then. By now, your preparation is done and the dough should be easier to handle with your hands.
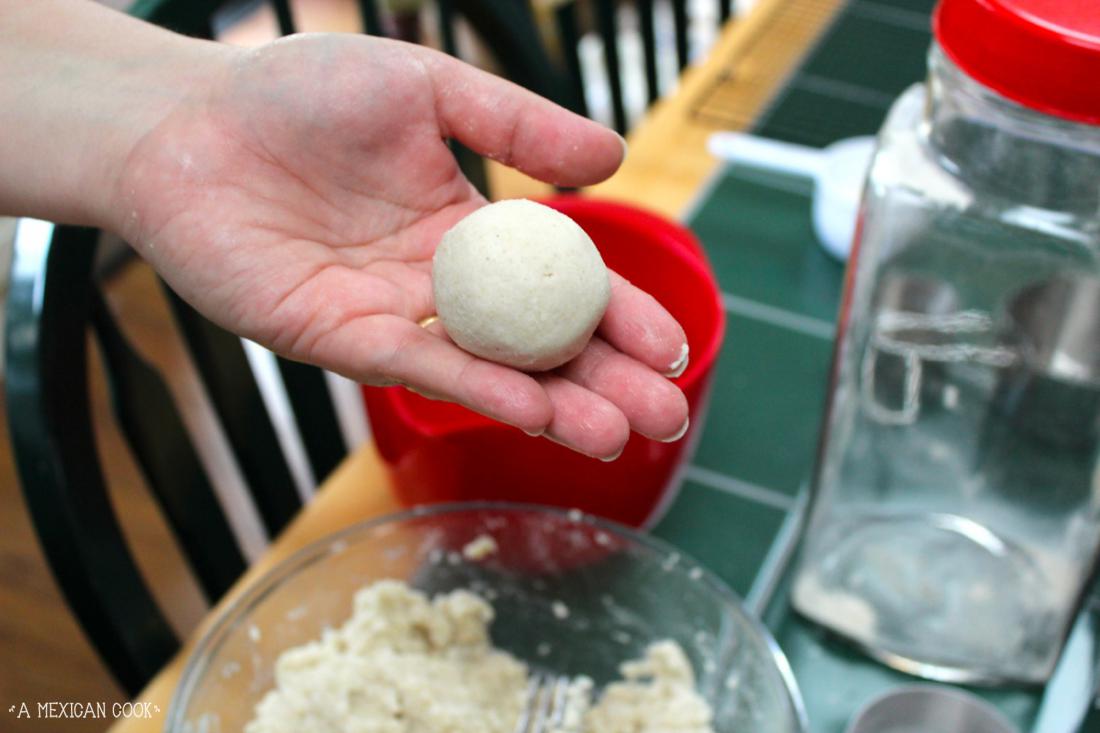
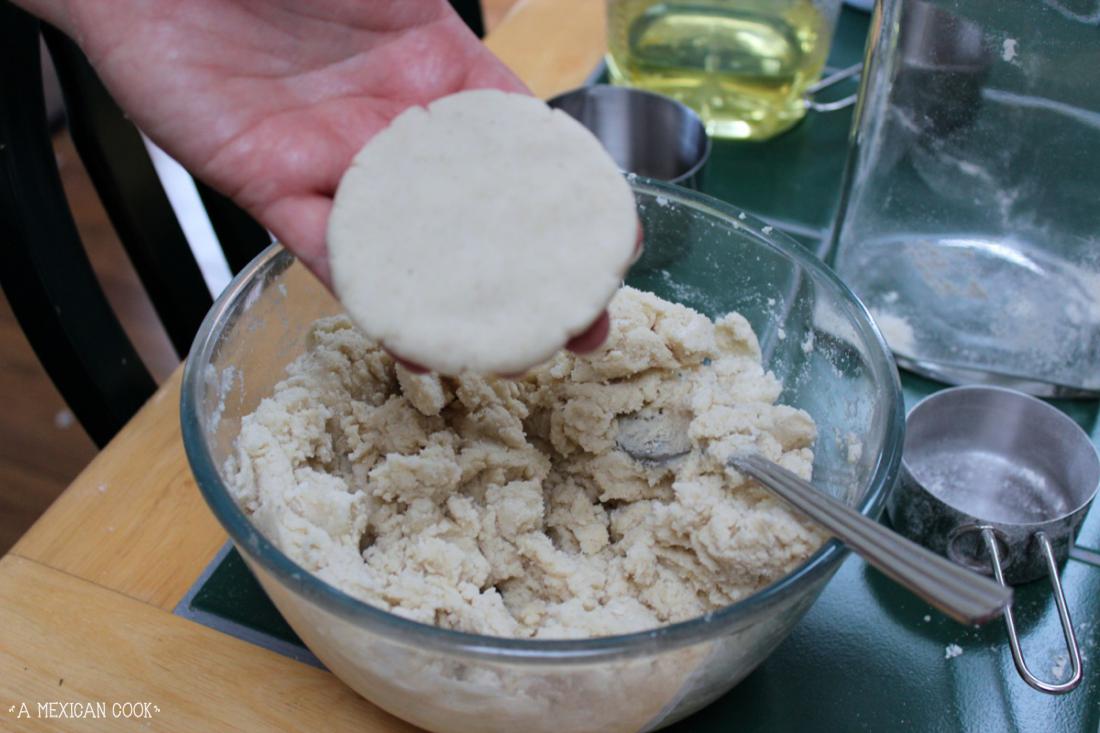
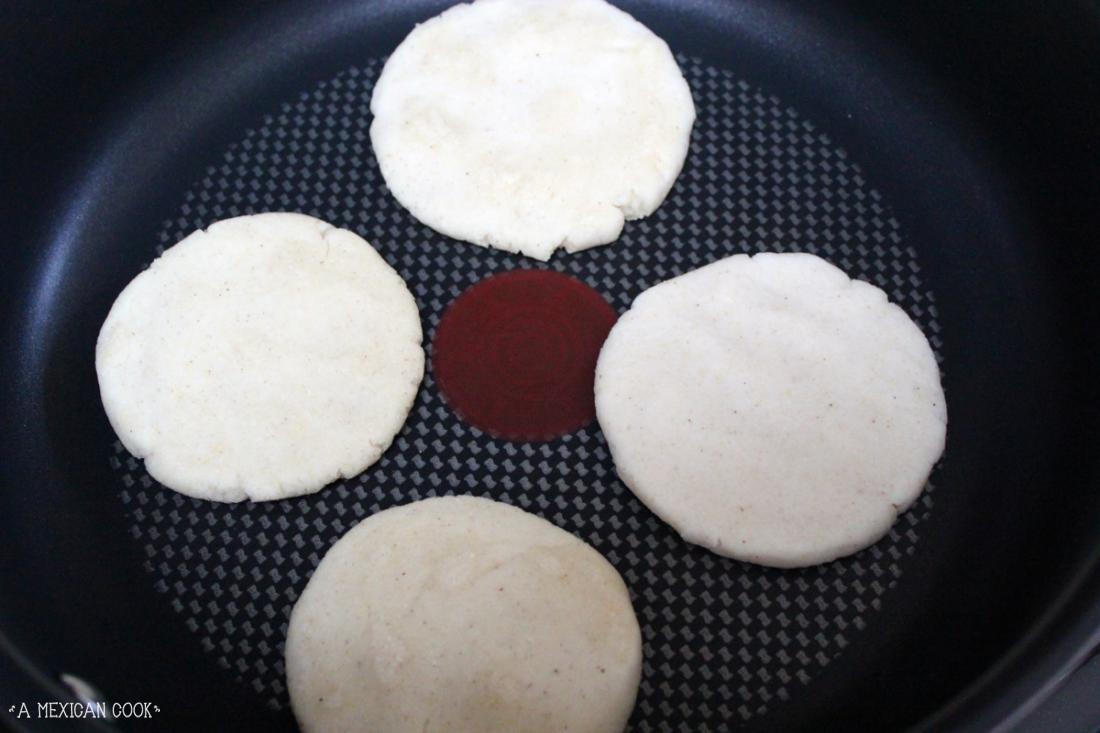
There are two very important things to make gorditas: your dough must be moist and warm and you should keep your hands wet (hence the bowl of fresh water near the dough). So before you start, wet your hands. I'm right handed, so instructions here are for right handed people, if you're left handed, adjust accordingly. Grab some dough and shape it into a ball the size of a golf ball. Place it on the wet palm of your left hand and with the fingers of your right hand, clap it flat. Repeat the clap about six times, moving your left hand from horizontal into a vertical position.
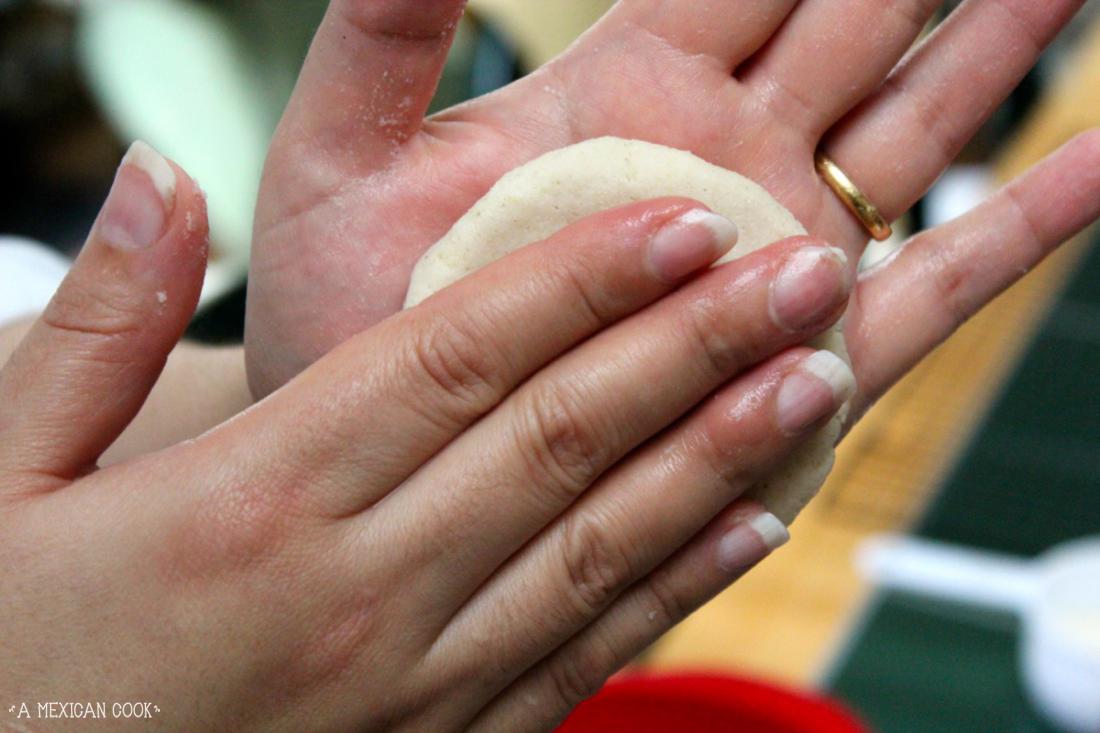
This sounds far worse than it actually is, so I have illustrated the movement on this video. Watch it a few times to get the knack of it. This is the most difficult part of the gordita making process and believe you me, you'll have the clapping down to an art after a few goes.
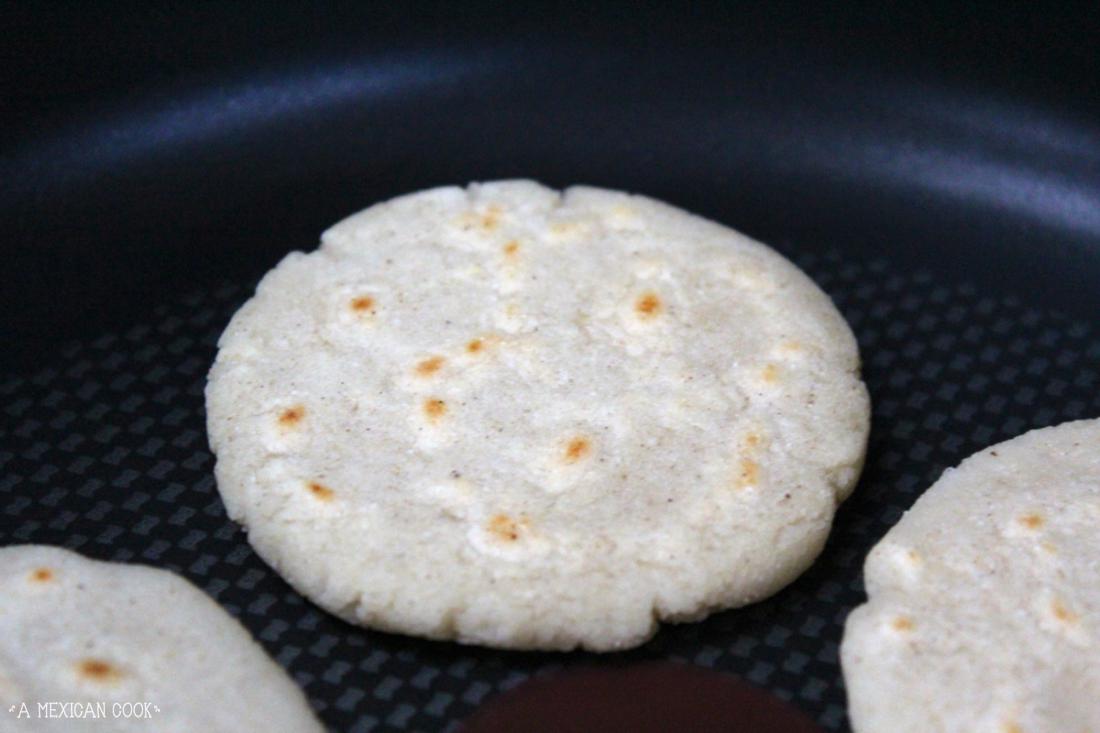
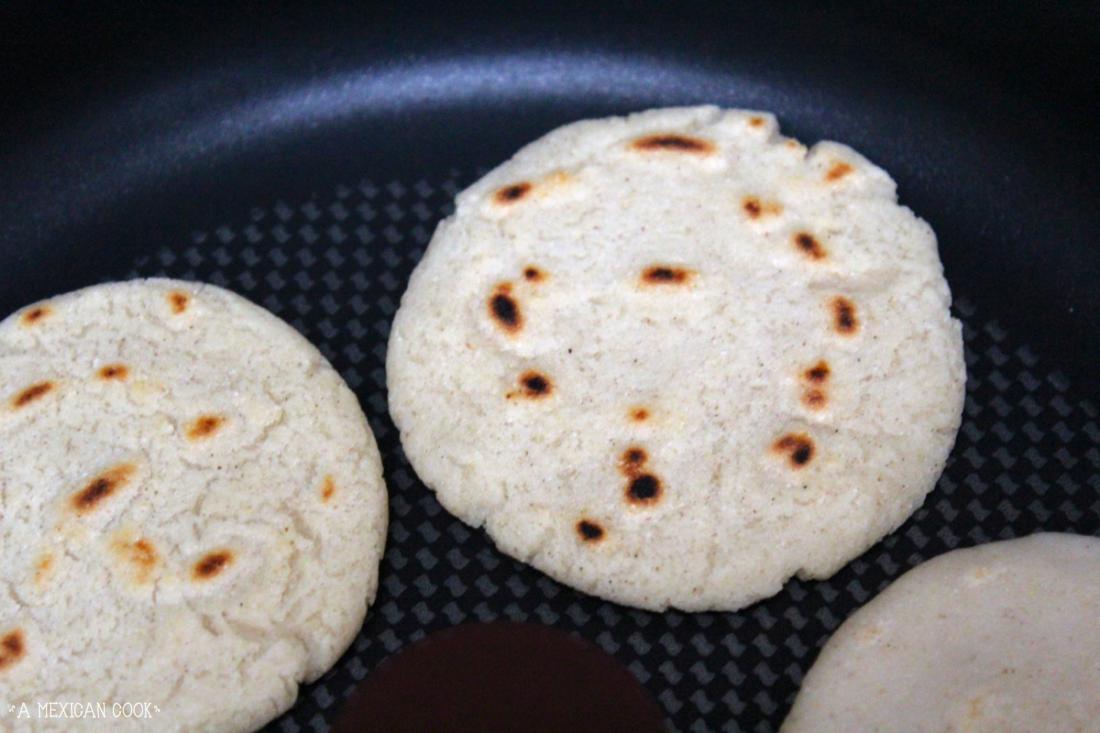
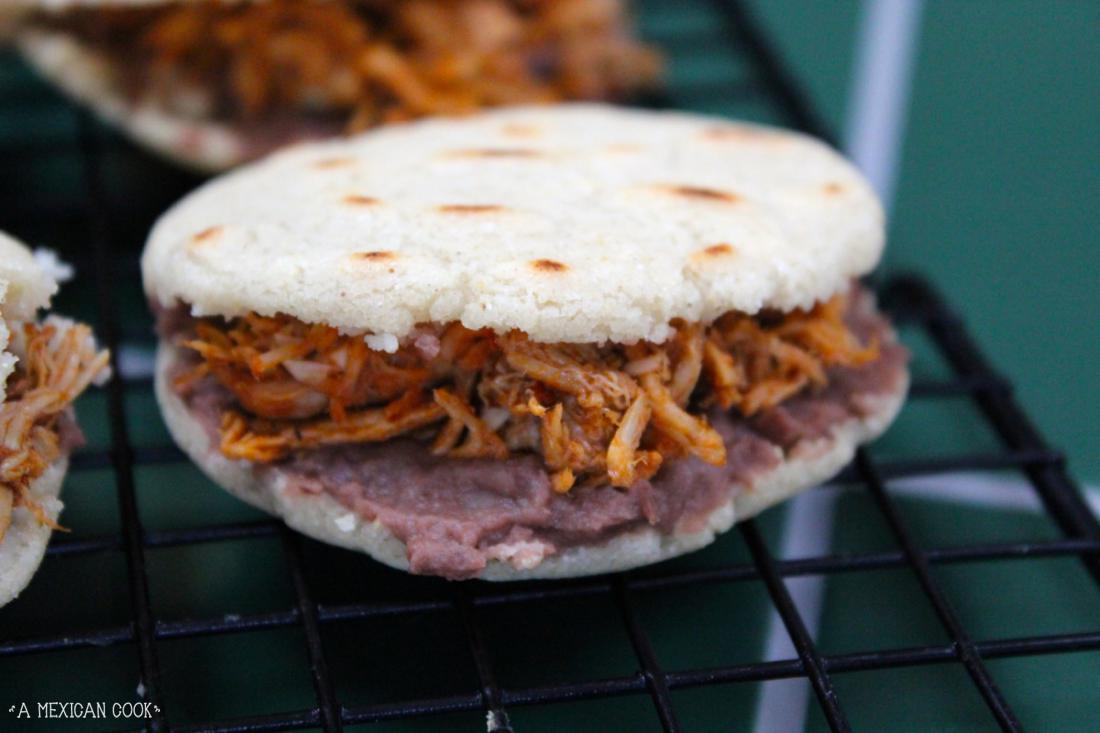
Once you have reached the desire size and shape of your gordita, place it on the hot pan at medium heat. Leave it for 5 seconds and, using your egg lifter, flip it to cook the other side. Cook this size in full, for about 2 minutes, before flipping it back to finish the cooking of the first side. This method of cooking the gorditas very little at first on one side, gives the gordita its structure. It also creates the top side (the one you cook for 5 seconds first and then finish off cooking later) and the bottom and stronger side of the gordita (the one you fully cook in one go). All this will make your gordita easy to cut open and fill. When you have enough practice, you'll be able to cook several gorditas at a time.
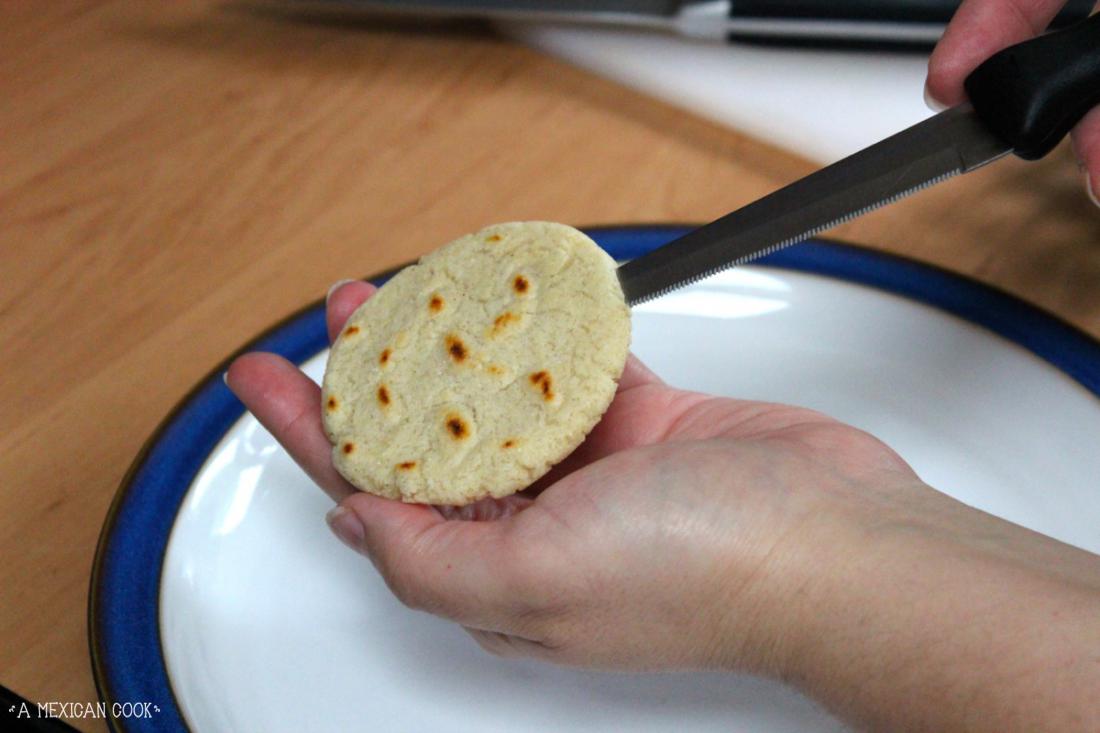
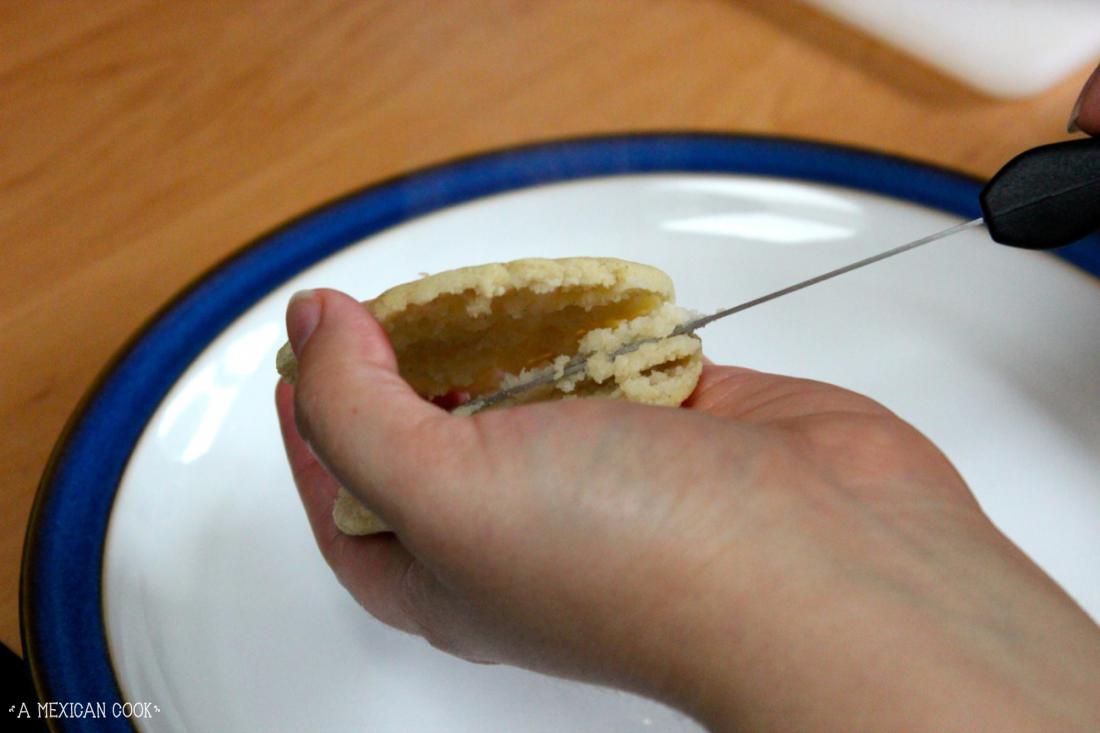
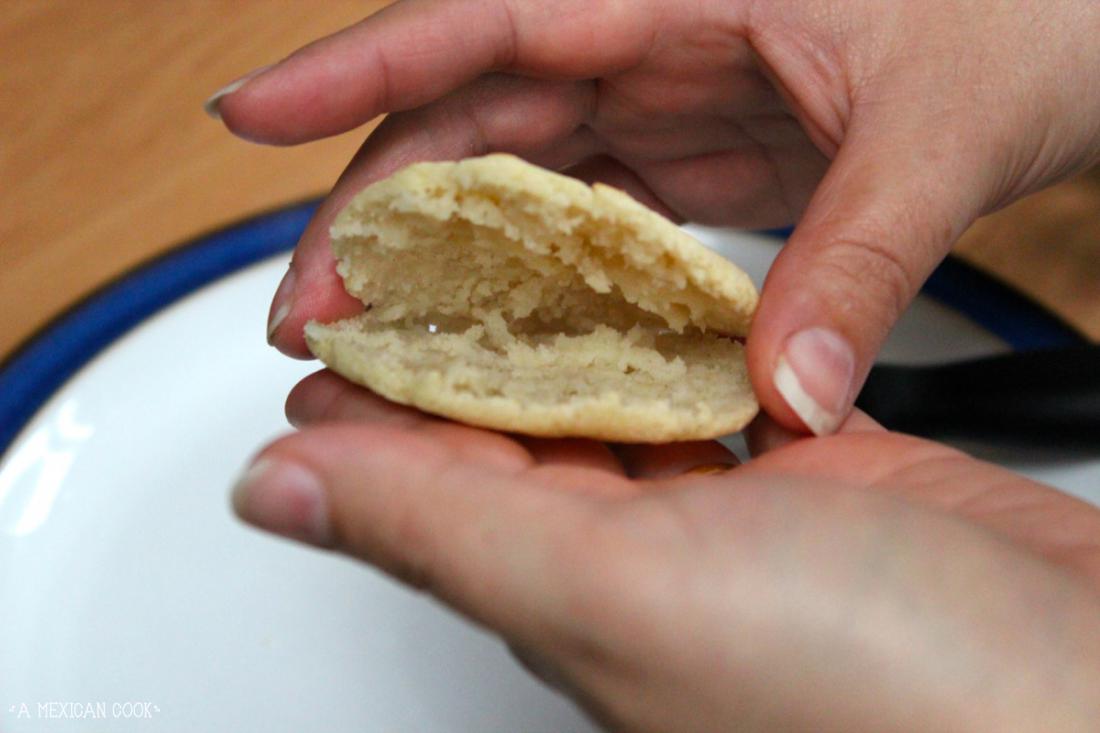
As soon as the gordita is cooked, take it out of the heat and place it in the plate next to the hob (the one you prepared before with the serrated knife close by). Leave it rest while you clap the next gordita, but as soon as you can (preferably while the other gordita cooks), use the serrated knife to slice the gordita open. Do not cut it open all the way, leave a quarter attached so that you can open it and fill it easily without detaching the cap or top side. If you do not cut your gorditas open while they're still hot, it will be very difficult to do it later. Don't worry if they look a little doughy inside, it is natural and any excess dough will come off in the knife, every time this happens, just wipe the knife clean with the kitchen paper towel before you go and cut another one open. Enlist the help of a friend or loved one if you want, it is really enjoyable to work with someone else in the kitchen.
When the gordita is cut open, you can stuff it with your favourite filling. I used the back of a teaspoon to put some refried beans on the bottom and then placed a spoonful of my turkey filling over the beans. The beans not only add flavour, but also act like a glue on the filling. Place your filled gordita on a wire rack to cool. If you are eating them straight away, once you have then done, put them in a baking tray and do a quick re-heat in the oven for 5 minutes at 160 Celsius. If you are freezing them, wait till they are completely cold and store them in an airtight container or a sip-lock bag. Use greaseproof paper to separate layers of gorditas and to prevent any sticking. Defrost for a couple of hours and heat on a dry pan or in the oven as above.
My mother taught me to make this dish recently. I've always loved them, but never learned to make them, so last summer while I was in Mexico, I asked her to show me how. It was the loveliest thing to do. We shared the space in the kitchen, she worked away for a while and I watched (no measurements for that woman, everything is a little bit of this, a bunch of that or a fistful of that), then I had a go at it until I got the clapping technique right. I hope you enjoy them, my Irish family certainly did!